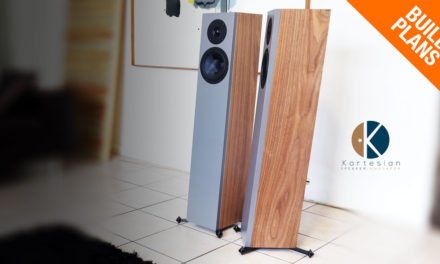
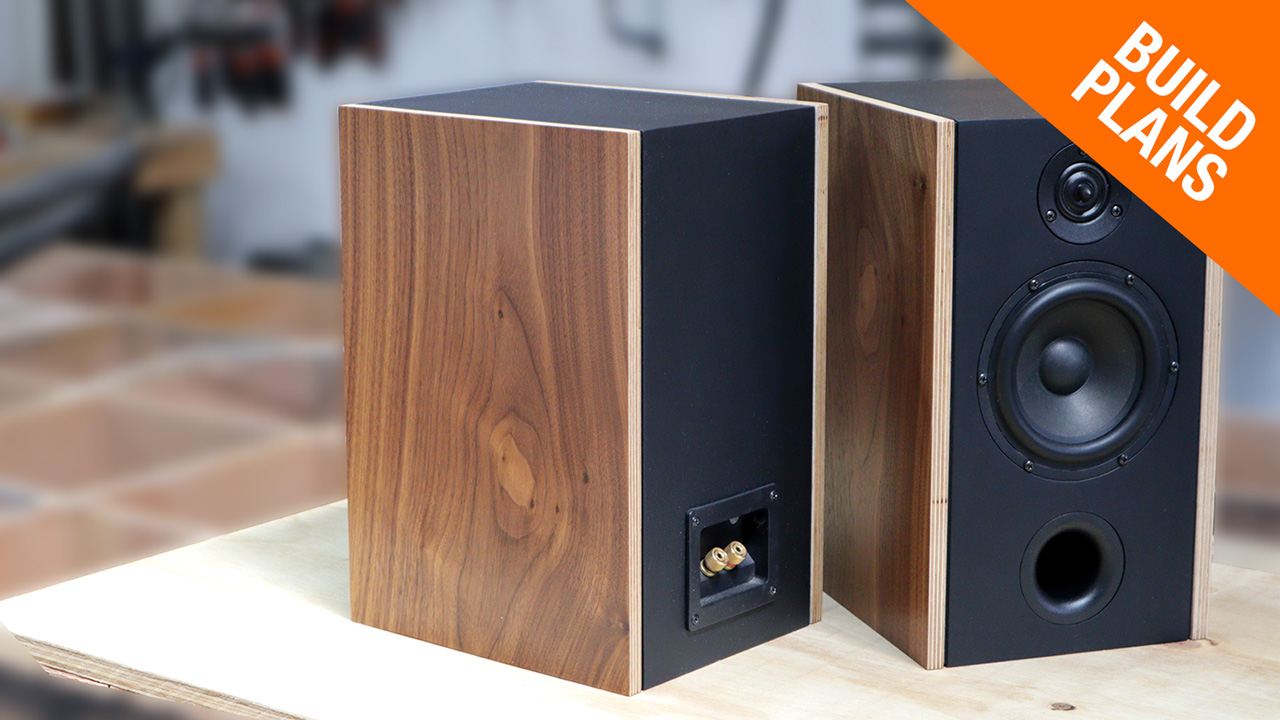
With the increasing popularity lately of the classic vintage styled large box format loudspeakers from manufacturers such as Wharfedale, KLH, PSB and others, I have set out to design and build my own version.
It will be a typical 3-way design with a tweeter, 4 inch mid-range and 8 inch woofer. The dimensions are roughly 600mm high, 300mm wide, and just short of 400mm deep.
The midrange and tweeter are offset from the center line on the baffle to counter any edge diffraction, however I do have a protruding frame around the baffle, but this did not cause me too many issues during the crossover design.
The mid-range driver has its own enclosure inside, and we have two braces to keep the cabinet as resonant free as possible. All panels are 18mm or 3/4inch MDF. The mid-range enclosure also has steps on the inside that is intended to break up any standing waves that might occur inside this small enclosure.
The port is a slot that exits towards the back, and is tuned to give a -3dB response at 35Hz.
The frame around the baffle is sold Kiaat wood, and real wood veneer of the same to finish off the enclosure.
I have also designed a stand that will put these off the floor at the right distance and at the right angle for the average listening position.
I have BUILD PLANS available for these here: https://soundblab.net/product/classic-vintage-style-3-way-speaker-build-plan/
This build will be fairly high end, and by this I mean in terms of the quality of the drivers I will use. Some time ago, you might remember that I designed and built a 2-way stand mount speaker with Punktkilde drivers. These drivers are manufactured by the same company that makes the very well engineered and considered high-end ScanSpeak speaker driver product line.
However, the Punktkilde drivers are currently only available for purchase from one online supplier that I am aware of, and this is SoundImports.eu in the Netherlands. The stocks levels are limited, so if you want to build these, I would recommend that you first find out if the drivers are available in the quantities you need.
The woofer is a carbon pulp cone 8inch woofer, and the mid-range, the 4inch version also with carbon pulp cone. Impedance for both is 4Ohms. These drivers are excellent quality, and SoundImports do have them on very good specials at the moment. For the tweeter I went with the very popular Fountek NEOCD3.0M Ribbon tweeter. It is available from Madisound Speaker Store in the US, and from a few European online stores. Links to these are at the bottom of this article.
I start off the build by having marked out the positions of the drivers on the baffles, and then continue to use my router with a straight cut bit and circle cutting jig to cut the holes. I got the trim router and the circle cutting jig from Banggood.com and both are excellent quality. The trim router fits Makita accessories and also uses the Makita 18V batteries. Purchase links are below.
The inside edge of the woofer and mid-range driver openings are bevelled with a 45 degree router bit to counter any reflections back onto the woofer cones.
There are two braces inside the enclosure, and these are marked out and drilled with a 50mm Fortsner bit and then the cut outs are made with a Jigsaw.
One of the braces fit around the mid-range enclosure, and this is also marked out and pre-cut on the table saw and then the remaining corner is cut with the Jigsaw.
A final touch on the braces is to give the inside edges a slight bevel to aid airflow inside the cabinet and perhaps also to assist with countering standing waves. The benefit of this is debatable though, but it looks nice at least.
The mid-range enclosure consist of four small panels that are glued together. I also glued four smaller pieces to the inside to create steps in the back of the enclosure. This will hopefully help with breaking up any potential standing waves inside this small volume. Of course both enclosure volumes will be lined with felt as damping material, but more on this later.
Now, I can cut the mitres for the side and top and bottom panels on the table saw, but I am having trouble to do this accurately on my table saw. I therefore devised a jig to use my small cordless Makita circular saw to cut these more accurately. So, if you do not have a table saw, then a jig like this can give you very accurate results with minimal tools required.
Now that the mitres have been cut, I can cut the rebates for the front and rear panels on the table saw.
Before the glue-up of the main enclosure, I mark out where the port and brace panels must go.
The side, top and bottom panels are then laid out and masking tape is used to secure the mitred edges to each other. I can then flip the assembly over, apply glue and bring it all together and use corner strap clamps to secure it until the glue dries. I also glue in the back panel to help the structure stay square.
The next step is to glue the port, brace panels and mid-range enclosure in place. These panels are secured from the side with brad nails and a few clamps. An 18mm MDF spacer block is used to align the port equal distance away from the bottom panel.
Before glueing the baffle in place and to allow me better access, I drill a hole for the wire that goes to the mid-range driver. The mid-range enclosure is also lined with felt and glued in place with normal PVA wood glue.
Next, I router the port opening before continuing to glue the rest of the felt panels to the inside of the enclosure.
The wire for the mid-range driver is fed through the hole and hot glue used to make an airtight seal. Better would be to use silicone or even 2-part epoxy, but if you use enough hot glue it does do a good job over time to seal the hole.
Finally, the baffle can be glued in place and clamped until the glue is dry.
The solid wood frame is 18x18mm strips that I cut on the table saw, and also beveled one side. These are measured and then cut with 45 degree mitres before glueing it in place over the baffle.
But before glueing it down, I use a Japanese Sumi Ink to stain the MDF baffle a deep dark black. Once dry the frame is glued in place with the aid of a few pieces of masking tape, off-cut wood pieces and clamps.
To apply the veneer to the enclosure, I use contact adhesive. Both the veneer and the enclosure sides are coated, I wait 10 minutes, and then carefully press the veneer in place and use a roller to press it down.
A trim router is used to trim the excess edges on the veneer, and then I can continue with the next side, until all surfaces have been covered with the veneer.
I also use the trim router with a flush trim bit to cut the port opening through the veneer on the back panel.
Before applying a finish, I sand the enclosure down with 240 grit sand paper. I used a danish oil applied with a brush, let it soak for a few minutes and rubbed it off with a clean cloth. This was done 3 times for a beautiful satin finish.
Even though the crossover network is not the most complicated in the world, I did try quite a few iterations before settling on this one. More often than not, less complicated is better. We have a 3rd order high pass on the tweeter, a 2nd order high and low pass on the mid-range, and a 2nd order on the bass driver. There are a few resistors in key places to bring all the drivers into level SPL range, and the coil in front of the tweeter circuit acts a bit like a notch filter to tame the upper frequencies of the tweeter above 5KHz.
The crossover components are assembled on a 6mm MDF board with cable ties. You can also use some hot glue or construction adhesive to further secure them in place. I often do not do this in my builds, since I like to continually tweak when I feel the need, and sometimes parts are used in other builds.
On the back of the enclosure, just above the slot port, two holes are drilled to accommodate the binding posts.
Here on my crossover board, you will see that I used a few capacitors in parallel to give me the values that I required, simply because I did not have the correct values in single capacitor at hand, but in the build plans I will obviously specify the single cap values and give links to each.
The divers are lined up and holes for mounting pre-drilled. I also include some more damping material in the top of the enclosure and behind the mid-range driver.
I can then mount the tweeter and mid-range driver, by soldering the wires to the speaker terminals. The tweeter has crimp terminals, but I did not show how this was connected.
Before the bass driver is installed, I can solder all the wires from the binding posts and other drivers to the crossover board. The crossover is placed at the back on top of the port panel, and I used a strong 3mm thick double sided tape for this.
Finally the bass driver is screwed in place after soldering the wires to the speaker terminals, and we are done.
Impedance is a nominal 4 Ohm, and only dips below that briefly at 2.9 Ohm between 1 and 2KHz, and should not be an issue for a 4 Ohm rated amplifier.
The frequency response is flat, except for a rise on the tweeter after 5KHz, however when we look at the in-room response, we see that it has flattened out and does not become audible. The -3dB point on this speaker is around 32Hz, and the in-room -3dB response will be in the mid twenties.
The directivity chart shows that we have good off-axis response all the way to 60 degrees across most of the frequency response. It only narrows slightly more at the very top end of the frequency range.
So, on paper the performance looks good, but the proof lies in how it sounds. This project was probably my most challenging yet, and most complicated to build and model a crossover for. However, the result is a high-end loudspeaker that has loads of detail and balance across the frequency range. Despite the wide baffle, the sound stage and imaging is still top notch, and when positioned right, they will still disappear into the background.
if you want to build these for yourself, grab the build plans here. However, I have to warn you that the Punktkilde drivers are only available at Soundimport.eu, and in limited supply. So, please go check if these driver are still available before purchasing the build plans or any other materials and parts. I will leave links to the drivers below.
Visit my Patreon and YouTube Membership pages where I post behind the scene footage, and where you can support me further.
Until next time, Adios!
PARTS:
| Speaker wire (14 AWG) | (US) https://parts-express.sjv.io/e4yRJz | (EU) https://bit.ly/39erRI4 |
| Fountek NeoCD3.0 Ribbon Tweeter | (US) https://shorturl.at/glG19 | (EU) https://shorturl.at/qvzJ8 |
| Punktkilde AUGWL0010-JN10 Mid-Woofer | EU Only | (EU) https://shorturl.at/ABIL0 |
| Punktkilde AUGWL0020-JN03 Woofer | EU Only | (EU) https://shorturl.at/hpOU2 |
| Pair Binding Posts | (US) https://parts-express.sjv.io/Xx0Xqb | (EU) https://shorturl.at/bhsuZ |
Black Sumi Ink | (US) https://amzn.to/3RrMPZw | (UK) https://amzn.to/3GwoETH |
| Makita 18V Cordless Trim Router Clone | (INT) https://s.click.aliexpress.com/e/_DeQOJxB |


